IMPORTANT DISCLAIMER
I cannot be held responsible for any damages that these instructions may cause. Continue at your own risk. With that said, if you follow the insturctions and are reasonably technicaly savy, you will be fine. J
Be sure that you do this with the original CPU in place. DO NOT REPLACE THE CPU YET. I will instruct you when you will need to open the case and replace the CPU.
First download and run the AFUWin utility to create a BIOS ROM file for your current settings. This way you can use the other program to open the ROM file and make changes.
Be sure that you do this with the original CPU in place. DO NOT REPLACE THE CPU YET.
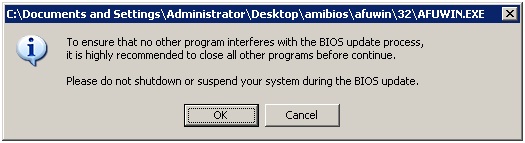
Once you unzip the AFUWin utility, open th amibios folder and go to the afuwin folder and choose the 32 folder for (32-bit OS), then execute the AFUWIN.EXE file.

Click OK when prompted
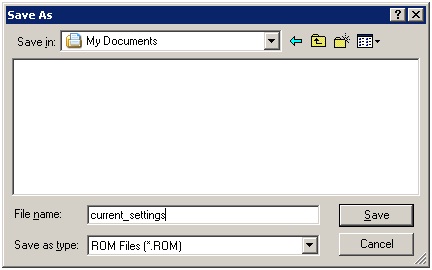
Click the Save button on the bottom for the program to load your current BIOS settings into a ROM file that we will edit later.

A new save as window will open. Choose to save it in your My Documents folder and save it as current_settings
You should see the window close and the system read the blocks within your BIOS as seen below.

Now you will open the AMIBCP_V3.37.exe file you downloaded earlier. This will allow us to open the newly created ROM file and make changes.

Click the open icon on the top and select the current_settings.rom file we created earlier.

Now drill down to: Advanced > CPU Configuration and focus your attention toward the bottom.

Notice the PECI is set for 00 for both Failsafe and Optimal. We want to change these to 01 for both. To do this click on the numbers 00 and a drop-down should allow you to change it to 01. When you’re done yours should look like mine:

I changed PECI and Intel SpeedStep tech to 01 for both Failsafe and Optimal. The key here is to change PECI, if you don’t change it you will stay in perpetual blinking blue status light after you replace your CPU and get nowhere fast.
Now go to File > Save as and save the file as new_cpu_settings

Now that we have created a new BIOS ROM file we will need to upload this file to the BIOS and replace what is currently there.
Now switch back to the AFUWIN program and click the Open button and select the newly created file, new_cpu_settings.rom.
Then, under the CMOS Options in the Setup menu select Load ROM File’s Optimal and then click on the Flash button on the bottom of the program. This will flash your BIOS with the new settings. DO NOT POWER DOWN YOUR SEVER DURING THIS PROCESS.

You will see the progress screen showing you that it is updating the blocks and verifying. Once it is complete, you will need to manually shut down your sever by going to Start > Shut Down.
Once the server shuts down on its own continue to follow the CPU replacement steps outlined here - the instructions are identical.
Go here for instructions on how to open the case.
Thanks to Cadman on the Mediasmarthome.com forums for the information and inspiration to do this.
See this thread for details and history.
11 comments:
I used these instructions to successfully change the smeleron processor in my EX485 to an E6500! It worked right away with no problems whatsoever. The temp is reading 49/50C most of the time. I have not tried to see if shutdown/sleep works; I dont use those.
Thank you for publishing these excellent instructions. ...Karl
Thanks, your instructions were great. Like the commentator above, I upgraded my EX485 from the Smelloron to a E6500 running at 2.93Ghz. So far temps are 52-54 and it is running smoothly. Voltages are good. I am looking forward to running ver 3 of software on this and it should be much speedier.
I recently upgradge the processor for an EX475 and the process is almost identical. The difference is in the actual chip release lever on the mother board but this is no biggy.
Thanks again for the info.
Another successful upgrade with
E6500!! My temps are pretty much the same, I use artic paste and a lot of patience for clean out the mess from my factory Smelloron (lol).
I can shut down my server remotely but the sleep mode is gone. So not big deal cause you can see the difference in performance!!!
Thanks for the info!
Congratulations on the successful upgrades. I'm thinking of using the E6500 myself but have a couple of questions: 1) How do the temps compare with the original Celeron? 2) Any issues with the automatic sleep/standby feature?
Would appreciate any input!
When I did my upgrade my temps raise from 48 to 51 without any stress, with video conversion I can hit under heavy load no more that 71. In my opinion that it's acceptable, also I can shut down the server remotely but the only thing I lost was the automatic sleep. I'm not sure if someone can fix that in the bios but I read something about upgrading the bios can fix that but I couldn't find time to experiment with it.
Any chance you still have a copy of AMIBCP_v3.37.exe ? The original source site no longer functions...
Thanks!
@Leake - I found a copy I can share with you. Any chance you have AFUWIN 4.42? I found 4.48 from AMI's support site, but it won't allow me to select anything under CMOS Options so I can't effectively flash changes to the BIOS.
@O-Dub - Can you share that copy of AMIBCP_v3.37.exe. Like you I have AFUWINv.4.48. Thanks in advance.
My experience was similar to this post in that I dropped in an E5200 SLAY7 proc with little results other than repeated restarts and a solid white light during post. I placed the original CPU back in I don't feel like buying a cable so I am trying this method to see if I can get past the boot issues with the new chip.
Does anyone have a link or copies of the mentioned files in the article. The links no longer work and I have yet to find them doing web searches. Thanks...
Post a Comment